Finding a font and Installing a custom font on Kindle may seem difficult, but it’s quite simple.
Let’s do it together [Step By Step]
How to Install Custom Font on Kindle
Find your font
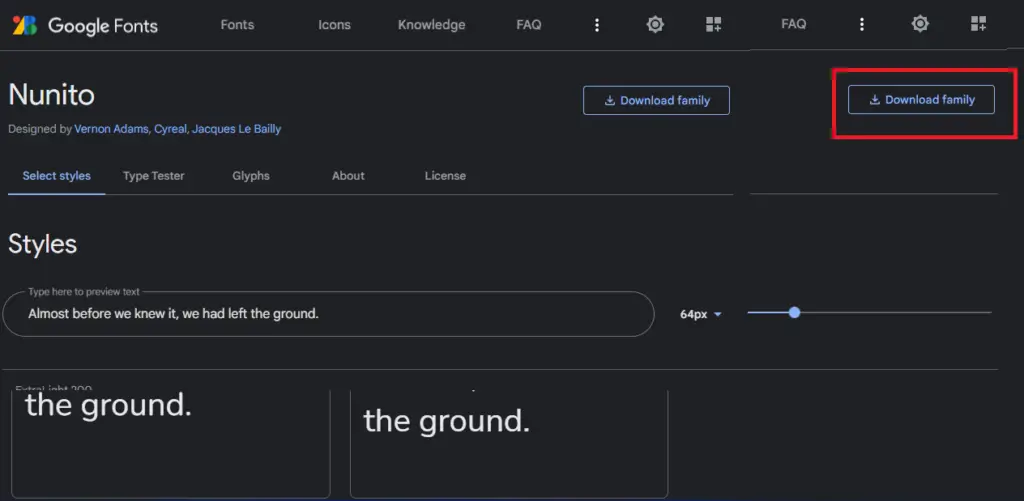
- Go to Google Fonts in your web browser
- Search for a font that you want to install on your Kindle.
- Once you do select the font, click on the download family button
Installing the font on the Kindle
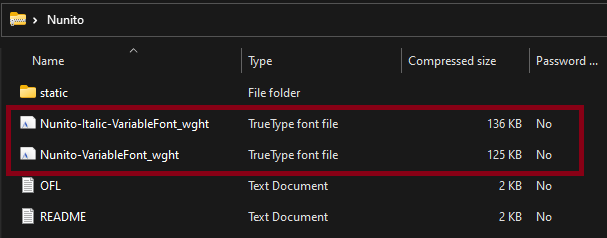
Now, Extract the font files from the .zip file.
You’ll find 2 files with a .ttf extension. These are the files you need to install the font on your Kindle.
Connect your Kindle to your computer using a USB cable. Your Kindle will show up as a drive in your file explorer.
- Open the Kindle drive
- Open the Kindle drive in your file explorer, and open the “fonts” folder
- Copy and paste the font files into the “fonts” folder.
- Eject your Kindle from your computer, and restart your device.
Your custom font will now be installed on your Kindle, and you can use it in any app that supports custom fonts!

Once, I installed lots of fonts on my kindle.
For few days, it was good experience but at the end I kept on changing it…
Ending up on my basic Amazon font lol
Did same sins too! But I love the nunito font
How to uninstall custom fonts on kindle paperwhite 5 6.8’?
Hi CJ, Delete the file from the directory; you’d be good to go!
Nice Article! I really appreciate your struggle. I want to install custom fonts on my Kindle for a long time. This is a very helpful article for my upcoming projects.
Thanks.
Glad it helped, David.
Is there a way to do it for the Kindle mobile app?
No I don’t think so